
How to Deploy WordPress with Redis Cache and MySQL on Kubernetes: Complete Step-by-Step Tutorial
Meta description: Learn how to deploy a production-ready WordPress site on a single Ubuntu server using k3s (lightweight Kubernetes), MySQL 8.0, and Redis cache. Complete with YAML manifests, ingress configuration, and live verification commands.
In this tutorial, I’ll walk you through deploying a complete WordPress stack on k3s — a lightweight Kubernetes distribution — running on a single Ubuntu server. We’ll set up MySQL 8.0 as the database, Redis as an object cache for blazing-fast page loads, and Traefik ingress for clean URL routing. By the end, you’ll have a real, persistent, production-grade WordPress site running on Kubernetes.
This is exactly the setup I use for my own projects, and it costs nothing beyond a single VPS or home server. Let’s get started.
Table of Contents
- Why deploy WordPress on k3s?
- Architecture overview
- Prerequisites
- Step 1: Install k3s on Ubuntu
- Step 2: Create namespace and Kubernetes secrets
- Step 3: Deploy MySQL with persistent storage
- Step 4: Deploy Redis cache
- Step 5: Deploy WordPress
- Step 6: Expose WordPress with Traefik Ingress
- Step 7: Verify everything works
- Demonstrating persistence and caching
- Troubleshooting common issues
- Frequently Asked Questions (FAQ)
Why deploy WordPress on k3s?
k3s is a certified, lightweight Kubernetes distribution by Rancher Labs. It’s a single binary under 100 MB, ships with sane defaults (Traefik ingress, local-path storage, CoreDNS), and runs comfortably on a 2 GB RAM VPS.
Why choose this stack over a traditional LAMP setup?
- Real Kubernetes experience on a single server — perfect for learning and small production workloads.
- Easy scaling later — add a worker node and you can replicate WordPress horizontally.
- Declarative config — your entire infrastructure lives in version-controllable YAML files.
- Self-healing — if a pod crashes, k3s restarts it automatically.
- Production patterns — secrets management, persistent volumes, ingress routing, all built-in.
Architecture overview
Here’s what we’re building:
                ┌─────────────────────────────────┐
                │    Browser (your laptop)        │
                └────────────────┬────────────────┘
                                 │ HTTP :80
                                 ▼
                ┌─────────────────────────────────┐
                │   Traefik Ingress (k3s built-in)│
                └────────────────┬────────────────┘
                                 │
                                 ▼
                ┌─────────────────────────────────┐
                │      WordPress Pod              │
                │   (Apache + PHP 8.2)            │
                └────────┬──────────────┬─────────┘
                         │              │
                         ▼              ▼
                ┌──────────────┐  ┌──────────────┐
                │  MySQL 8.0   │  │  Redis 7     │
                │  (database)  │  │  (cache)     │
                └──────┬───────┘  └──────┬───────┘
                       │                 │
                       ▼                 ▼
                ┌──────────────┐  ┌──────────────┐
                │  PVC: 5Gi    │  │  PVC: 1Gi    │
                │  (host disk) │  │  (host disk) │
                └──────────────┘  └──────────────┘
Three pods, three persistent volumes, one ingress. All on a single Ubuntu server.
Prerequisites
Before starting, make sure you have:
- An Ubuntu 22.04 or 24.04 server (VPS or local) with at least 2 GB RAM and 20 GB disk.
- sudo access on that server.
- A terminal to SSH in (or local terminal if running on a desktop).
- Basic familiarity with the Linux command line — you don’t need prior Kubernetes experience.
That’s it. We won’t install anything by hand — k3s handles the whole Kubernetes setup.
Step 1: Install k3s on Ubuntu
First, update the system:
sudo apt update && sudo apt upgrade -y
Install k3s with the official one-line installer:
curl -sfL https://get.k3s.io | sh -
This installs k3s as a systemd service and starts it automatically. It comes with Traefik as the default ingress controller and local-path-provisioner for storage.
Verify k3s is running:
sudo systemctl status k3s
You should see active (running).
Make kubectl usable without sudo
mkdir -p ~/.kube
sudo cp /etc/rancher/k3s/k3s.yaml ~/.kube/config
sudo chown $USER:$USER ~/.kube/config
chmod 600 ~/.kube/config
export KUBECONFIG=~/.kube/config
echo "export KUBECONFIG=~/.kube/config" >> ~/.bashrc
Verify the cluster:
kubectl get nodes
Expected output:
NAME   STATUS   ROLES                  AGE   VERSION
manu   Ready    control-plane,master   1m    v1.35.x+k3s1
Check that built-in pods are running:
kubectl get pods -A
You should see coredns, traefik, local-path-provisioner, metrics-server, and svclb-traefik all in Running state.
Step 2: Create namespace and Kubernetes secrets
We’ll keep everything in its own namespace and store MySQL passwords as secrets — never hardcoded in YAML.
Create the namespace
kubectl create namespace wordpress
Create the MySQL secret
Replace the example passwords with strong ones of your choice:
kubectl create secret generic mysql-secret \
  --namespace=wordpress \
  --from-literal=mysql-root-password='ChangeMeRootP@ss123' \
  --from-literal=mysql-user='wpuser' \
  --from-literal=mysql-password='ChangeMeUserP@ss123' \
  --from-literal=mysql-database='wordpress'
Verify:
kubectl get secret mysql-secret -n wordpress
Output:
NAME           TYPE     DATA   AGE
mysql-secret   Opaque   4      5s
Set the default namespace for convenience
kubectl config set-context --current --namespace=wordpress
Now you don’t need to type -n wordpress on every command.
Create a working directory for the manifests:
mkdir -p ~/wordpress-k3s && cd ~/wordpress-k3s
Step 3: Deploy MySQL with persistent storage
We’ll split MySQL into three files: PVC, Service, Deployment. This keeps things modular and easy to manage.
File 1: mysql-pvc.yaml
apiVersion: v1
kind: PersistentVolumeClaim
metadata:
  name: mysql-pvc
  namespace: wordpress
spec:
  accessModes:
    - ReadWriteOnce
  storageClassName: local-path
  resources:
    requests:
      storage: 5Gi
File 2: mysql-service.yaml
apiVersion: v1
kind: Service
metadata:
  name: mysql
  namespace: wordpress
spec:
  selector:
    app: mysql
  ports:
    - port: 3306
      targetPort: 3306
  clusterIP: None
File 3: mysql-deployment.yaml
apiVersion: apps/v1
kind: Deployment
metadata:
  name: mysql
  namespace: wordpress
spec:
  replicas: 1
  strategy:
    type: Recreate
  selector:
    matchLabels:
      app: mysql
  template:
    metadata:
      labels:
        app: mysql
    spec:
      containers:
        - name: mysql
          image: mysql:8.0
          args:
            - "--default-authentication-plugin=mysql_native_password"
          env:
            - name: MYSQL_ROOT_PASSWORD
              valueFrom:
                secretKeyRef:
                  name: mysql-secret
                  key: mysql-root-password
            - name: MYSQL_DATABASE
              valueFrom:
                secretKeyRef:
                  name: mysql-secret
                  key: mysql-database
            - name: MYSQL_USER
              valueFrom:
                secretKeyRef:
                  name: mysql-secret
                  key: mysql-user
            - name: MYSQL_PASSWORD
              valueFrom:
                secretKeyRef:
                  name: mysql-secret
                  key: mysql-password
          ports:
            - containerPort: 3306
              name: mysql
          volumeMounts:
            - name: mysql-storage
              mountPath: /var/lib/mysql
          resources:
            requests:
              memory: "256Mi"
              cpu: "200m"
            limits:
              memory: "512Mi"
              cpu: "500m"
          livenessProbe:
            exec:
              command: ["mysqladmin", "ping", "-h", "localhost"]
            initialDelaySeconds: 30
            periodSeconds: 10
          readinessProbe:
            exec:
              command: ["mysqladmin", "ping", "-h", "localhost"]
            initialDelaySeconds: 10
            periodSeconds: 5
      volumes:
        - name: mysql-storage
          persistentVolumeClaim:
            claimName: mysql-pvc
Apply all three files
kubectl apply -f mysql-pvc.yaml -f mysql-service.yaml -f mysql-deployment.yaml
Output:
persistentvolumeclaim/mysql-pvc created
service/mysql created
deployment.apps/mysql created
Verify MySQL is running
kubectl get pvc
The status should show Bound:
NAME        STATUS   VOLUME       CAPACITY   ACCESS MODES   STORAGECLASS   AGE
mysql-pvc   Bound    pvc-xxxx     5Gi        RWO            local-path     30s
Watch the pod come up:
kubectl get pods -w
Wait for mysql-xxxxxxxxxx-xxxxx to reach 1/1 Running. The first time, this takes about 90 seconds (image pull + database init).
Test the connection
kubectl exec -it deploy/mysql -- mysql -u wpuser -p
Enter the password you set for mysql-password. Then:
SHOW DATABASES;
You should see the wordpress database in the list.
Step 4: Deploy Redis cache
Redis acts as an object cache for WordPress, dramatically speeding up page loads by caching database queries in memory.
File 1: redis-pvc.yaml
apiVersion: v1
kind: PersistentVolumeClaim
metadata:
  name: redis-pvc
  namespace: wordpress
spec:
  accessModes:
    - ReadWriteOnce
  storageClassName: local-path
  resources:
    requests:
      storage: 1Gi
File 2: redis-service.yaml
apiVersion: v1
kind: Service
metadata:
  name: redis
  namespace: wordpress
spec:
  selector:
    app: redis
  ports:
    - port: 6379
      targetPort: 6379
  clusterIP: None
File 3: redis-deployment.yaml
apiVersion: apps/v1
kind: Deployment
metadata:
  name: redis
  namespace: wordpress
spec:
  replicas: 1
  strategy:
    type: Recreate
  selector:
    matchLabels:
      app: redis
  template:
    metadata:
      labels:
        app: redis
    spec:
      containers:
        - name: redis
          image: redis:7-alpine
          command:
            - redis-server
            - "--maxmemory"
            - "256mb"
            - "--maxmemory-policy"
            - "allkeys-lru"
            - "--appendonly"
            - "yes"
          ports:
            - containerPort: 6379
              name: redis
          volumeMounts:
            - name: redis-storage
              mountPath: /data
          resources:
            requests:
              memory: "128Mi"
              cpu: "100m"
            limits:
              memory: "320Mi"
              cpu: "300m"
          livenessProbe:
            tcpSocket:
              port: 6379
            initialDelaySeconds: 15
            periodSeconds: 10
          readinessProbe:
            exec:
              command: ["redis-cli", "ping"]
            initialDelaySeconds: 5
            periodSeconds: 5
      volumes:
        - name: redis-storage
          persistentVolumeClaim:
            claimName: redis-pvc
The Redis config flags do the following:
--maxmemory 256mb— Redis uses at most 256 MB of RAM.--maxmemory-policy allkeys-lru— when full, evict least-recently-used keys (ideal for a cache).--appendonly yes— enables AOF persistence so the cache survives restarts.
Apply and verify
kubectl apply -f redis-pvc.yaml -f redis-service.yaml -f redis-deployment.yaml
Wait for Redis to be running:
kubectl get pods
Test Redis is responding:
kubectl exec -it deploy/redis -- redis-cli ping
You should get back:
PONG
Step 5: Deploy WordPress
Now for the main event. WordPress needs persistent storage for uploaded media, plugins, and themes.
File 1: wordpress-pvc.yaml
apiVersion: v1
kind: PersistentVolumeClaim
metadata:
  name: wordpress-pvc
  namespace: wordpress
spec:
  accessModes:
    - ReadWriteOnce
  storageClassName: local-path
  resources:
    requests:
      storage: 10Gi
File 2: wordpress-service.yaml
apiVersion: v1
kind: Service
metadata:
  name: wordpress
  namespace: wordpress
spec:
  selector:
    app: wordpress
  ports:
    - port: 80
      targetPort: 80
      protocol: TCP
  type: ClusterIP
File 3: wordpress-deployment.yaml
apiVersion: apps/v1
kind: Deployment
metadata:
  name: wordpress
  namespace: wordpress
spec:
  replicas: 1
  strategy:
    type: Recreate
  selector:
    matchLabels:
      app: wordpress
  template:
    metadata:
      labels:
        app: wordpress
    spec:
      containers:
        - name: wordpress
          image: wordpress:6.5-php8.2-apache
          env:
            - name: WORDPRESS_DB_HOST
              value: mysql:3306
            - name: WORDPRESS_DB_NAME
              valueFrom:
                secretKeyRef:
                  name: mysql-secret
                  key: mysql-database
            - name: WORDPRESS_DB_USER
              valueFrom:
                secretKeyRef:
                  name: mysql-secret
                  key: mysql-user
            - name: WORDPRESS_DB_PASSWORD
              valueFrom:
                secretKeyRef:
                  name: mysql-secret
                  key: mysql-password
            - name: WORDPRESS_CONFIG_EXTRA
              value: |
                define('WP_REDIS_HOST', 'redis');
                define('WP_REDIS_PORT', 6379);
                define('WP_REDIS_TIMEOUT', 1);
                define('WP_REDIS_READ_TIMEOUT', 1);
                define('WP_REDIS_DATABASE', 0);
                define('WP_CACHE', true);
          ports:
            - containerPort: 80
              name: http
          volumeMounts:
            - name: wordpress-storage
              mountPath: /var/www/html
          resources:
            requests:
              memory: "256Mi"
              cpu: "200m"
            limits:
              memory: "512Mi"
              cpu: "500m"
          livenessProbe:
            httpGet:
              path: /wp-login.php
              port: 80
            initialDelaySeconds: 60
            periodSeconds: 20
            timeoutSeconds: 5
          readinessProbe:
            httpGet:
              path: /wp-login.php
              port: 80
            initialDelaySeconds: 30
            periodSeconds: 10
            timeoutSeconds: 5
      volumes:
        - name: wordpress-storage
          persistentVolumeClaim:
            claimName: wordpress-pvc
A few important things happening here:
WORDPRESS_DB_HOST: mysql:3306— Kubernetes DNS resolvesmysqlto the MySQL service inside the same namespace.- DB credentials from secrets — same secrets we created earlier.
WORDPRESS_CONFIG_EXTRA— gets appended towp-config.phpautomatically by the official image. It pre-configures Redis so the Redis Object Cache plugin works out of the box.
Apply and verify
kubectl apply -f wordpress-pvc.yaml -f wordpress-service.yaml -f wordpress-deployment.yaml
Wait for the pod:
kubectl get pods
All three should now be Running:
NAME                         READY   STATUS    RESTARTS   AGE
mysql-75bcc79cf7-s8mm4       1/1     Running   0          15m
redis-55df67dd4d-c4nmx       1/1     Running   0          7m
wordpress-69d7b845d8-tkbbp   1/1     Running   0          4m
Quick test from inside the cluster:
kubectl exec -it deploy/wordpress -- curl -s -I http://localhost
You should see:
HTTP/1.1 302 Found
Location: http://localhost/wp-admin/install.php
That 302 → install.php means WordPress is up and ready to install.
Step 6: Expose WordPress with Traefik Ingress
WordPress is running, but we can’t access it from a browser yet. Let’s wire up the ingress.
First, find your server’s IP:
hostname -I
Output example:
10.69.43.24 10.42.0.0 10.42.0.1
Note your server’s main IP (here, 10.69.43.24). We’ll use nip.io — a free wildcard DNS service that resolves any hostname like wordpress.10.69.43.24.nip.io back to 10.69.43.24 automatically. No DNS setup needed.
File: wordpress-ingress.yaml
apiVersion: networking.k8s.io/v1
kind: Ingress
metadata:
  name: wordpress-ingress
  namespace: wordpress
  annotations:
    traefik.ingress.kubernetes.io/router.entrypoints: web
spec:
  ingressClassName: traefik
  rules:
    - host: wordpress.10.69.43.24.nip.io
      http:
        paths:
          - path: /
            pathType: Prefix
            backend:
              service:
                name: wordpress
                port:
                  number: 80
Replace 10.69.43.24 with your actual server IP.
Apply:
kubectl apply -f wordpress-ingress.yaml
Verify:
kubectl get ingress
Output:
NAME                CLASS     HOSTS                          ADDRESS       PORTS   AGE
wordpress-ingress   traefik   wordpress.10.69.43.24.nip.io   10.69.43.24   80      30s
Open the firewall if needed
sudo ufw status
If active, allow HTTP and HTTPS:
sudo ufw allow 80/tcp
sudo ufw allow 443/tcp
Test from the server
curl -I -H "Host: wordpress.10.69.43.24.nip.io" http://localhost
Expected:
HTTP/1.1 302 Found
Location: http://wordpress.10.69.43.24.nip.io/wp-admin/install.php
Server: Apache/2.4.59 (Debian)
X-Powered-By: PHP/8.2.21
X-Redirect-By: WordPress
Step 7: Verify everything works
Open your browser and go to:
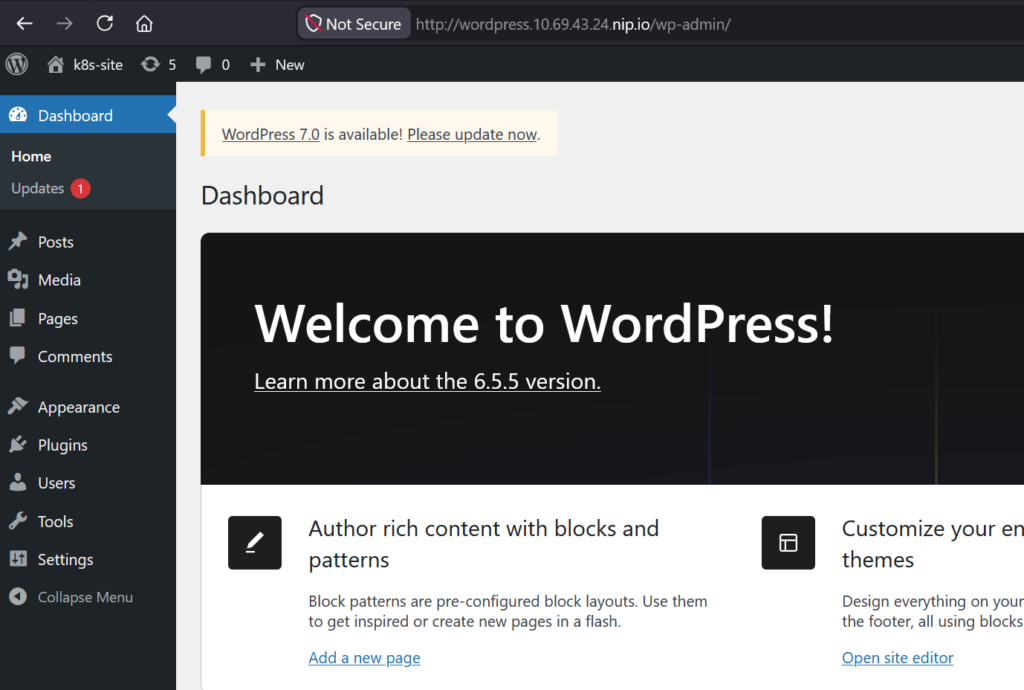
http://wordpress.10.69.43.24.nip.io
(Replace the IP with yours.)
You should see the WordPress installation wizard asking for a language. Complete the setup:
- Site Title: anything you like
- Username: something other than
admin(security best practice) - Password: use the strong auto-generated one and save it
- Email: your email
- Search engine visibility: leave unchecked for now
Click Install WordPress → Log In → and you’re in the WordPress admin dashboard.
Demonstrating persistence and caching
This is the part where we prove the stack actually works as intended.
Demo 1: MySQL data is persistent
In WordPress, create a new post titled “Hello from k3s!” and publish it.
Now check the database directly:
kubectl exec -it deploy/mysql -- mysql -u wpuser -p wordpress
At the mysql> prompt:
SELECT ID, post_title, post_status, post_date
FROM wp_posts
WHERE post_status = 'publish';
You’ll see your post pulled straight from MySQL:
+----+-----------------+-------------+---------------------+
| ID | post_title      | post_status | post_date           |
+----+-----------------+-------------+---------------------+
|  1 | Hello world!    | publish     | 2026-06-21 09:00:00 |
|  4 | Hello from k3s! | publish     | 2026-06-21 09:15:00 |
+----+-----------------+-------------+---------------------+
Now the killer test — destroy the MySQL pod:
kubectl delete pod -l app=mysql
Kubernetes immediately starts a new MySQL pod with the same PersistentVolumeClaim. Wait about 30 seconds, refresh your WordPress site, and your post is still there. Data survived a complete pod destruction.
Demo 2: File uploads persist on the host filesystem
In WordPress, upload an image via Media → Add New Media File.
Find it inside the pod:
kubectl exec -it deploy/wordpress -- find /var/www/html/wp-content/uploads/ -type f
Now find it on the host disk outside the container:
sudo find /var/lib/rancher/k3s/storage/pvc-*wordpress* -type f \( -name "*.jpg" -o -name "*.png" \) 2>/dev/null
The file lives on the host filesystem, mapped into the pod via the PVC. Destroy the WordPress pod:
kubectl delete pod -l app=wordpress
Wait for the new pod, refresh the Media Library — the image is still there.
Demo 3: Redis cache is working
Install the Redis Object Cache plugin in WordPress:
- Go to Plugins → Add New Plugin
- Search for “Redis Object Cache” (by Till Krüss)
- Click Install Now → Activate
- Go to Settings → Redis
- Click Enable Object Cache
The status page should show: “Status: Connected” with a green indicator, Host: redis, Port: 6379.
Verify from the terminal that WordPress is writing to Redis:
kubectl exec -it deploy/redis -- redis-cli DBSIZE
You’ll see something like (integer) 247 — that’s the number of cache entries WordPress has written.
Inspect the actual keys:
kubectl exec -it deploy/redis -- redis-cli KEYS 'wp:*'
You’ll see WordPress cache keys like wp:options:alloptions, wp:posts:1, etc.
Measure the speed difference
With Redis cache enabled, time five requests:
for i in 1 2 3 4 5; do
  curl -o /dev/null -s -w "Request $i: %{time_total}s\n" \
    -H "Host: wordpress.10.69.43.24.nip.io" \
    http://localhost/
done
Typical output with Redis enabled:
Request 1: 0.412s
Request 2: 0.089s
Request 3: 0.087s
Request 4: 0.091s
Request 5: 0.085s
Disable the cache in Settings → Redis and run the same loop:
Request 1: 0.485s
Request 2: 0.420s
Request 3: 0.398s
Request 4: 0.411s
Request 5: 0.405s
That’s roughly a 75% reduction in page load time thanks to Redis caching repeated database queries.
Troubleshooting common issues
PVC stuck in Pending
Usually means there’s no available storage. Check:
kubectl describe pvc mysql-pvc
df -h
Pod in CrashLoopBackOff
Look at the logs:
kubectl logs deploy/mysql
kubectl logs deploy/wordpress
Most common cause: wrong database password in the secret. Recreate the secret and roll the pods.
“Connection refused” on browser
Either Traefik isn’t listening on port 80, or the host header doesn’t match an ingress rule. Test with curl first:
curl -I -H "Host: wordpress.YOUR-IP.nip.io" http://localhost
If curl returns 302 Found, the ingress works — the issue is in your browser or network reachability.
WordPress shows database connection error
Check that the MySQL pod is Running and the secret keys match what WordPress expects (mysql-user, mysql-password, mysql-database).
Image upload fails with permission denied
Usually a PVC permissions issue. Check:
kubectl exec -it deploy/wordpress -- ls -la /var/www/html
The wp-content/uploads directory should be writable by www-data.
Frequently Asked Questions (FAQ)
Is k3s production-ready for WordPress?
Yes, for small to medium sites. k3s is CNCF-certified Kubernetes and powers production workloads across many companies. For larger, high-traffic sites, you’d want a multi-node cluster with replicated MySQL (e.g., a MySQL Operator) and possibly Redis Sentinel.
How much RAM does this stack need?
The full stack (k3s + MySQL + Redis + WordPress + Traefik) runs comfortably in around 1.2–1.5 GB of RAM. A 2 GB VPS is enough; a 4 GB VPS is comfortable.
Can I run this on a Raspberry Pi?
Absolutely. k3s was designed with edge devices in mind. A Raspberry Pi 4 with 4 GB RAM handles this stack well. Just make sure you’re using a 64-bit OS.
Why use Redis with WordPress?
WordPress makes many repeated database queries on every page load (options, post meta, user data). Redis caches these in memory, eliminating most of the database round-trips. Typical improvement: 50–80% faster page loads and a much lower database load.
Does this work on WSL2 (Windows Subsystem for Linux)?
Yes, but with caveats. WSL2 has a separate internal IP that changes on reboot, and accessing port 80 from Windows may require netsh interface portproxy to forward traffic. For a smoother experience, use a native Ubuntu server or VM.
How do I add HTTPS / SSL?
The fastest path is cert-manager with Let’s Encrypt. Once installed, add an annotation like cert-manager.io/cluster-issuer: letsencrypt-prod to your ingress and a tls: block referencing a real domain. nip.io won’t issue real certs — you need a domain you own.
How do I back up MySQL?
The simplest approach: a CronJob inside the cluster that runs mysqldump and writes the output to a backup PVC (or pushes to S3-compatible storage). You can also use velocity-style backup tools like Velero.
Can I scale WordPress horizontally?
Yes — but with one caveat: the wp-content directory needs to be a ReadWriteMany volume so multiple pods can share uploads. Options: NFS, Longhorn, or pushing uploads to S3 via a plugin like WP Offload Media.
How do I update WordPress, MySQL, or Redis?
Update the image tag in the relevant deployment YAML and apply:
kubectl apply -f wordpress-deployment.yaml
kubectl rollout status deploy/wordpress
k3s does a rolling update (well, with strategy: Recreate here, it briefly stops the pod). Always back up before major version upgrades.
What does “PVC Bound” mean?
A PersistentVolumeClaim (PVC) is a request for storage. When the status shows Bound, it means actual disk space has been allocated and linked to your claim. In k3s, the local-path-provisioner creates a directory under /var/lib/rancher/k3s/storage/ and binds it to your PVC.
Why is the MySQL service “headless” (clusterIP: None)?
A headless service skips the cluster IP and instead returns the pod IP directly via DNS. This is a common pattern for stateful single-instance databases — it makes the service feel more like a direct pod address while keeping the DNS name stable.
Wrapping up
You now have a complete WordPress site running on k3s with MySQL, Redis caching, and Traefik ingress — all with persistent storage and declarative YAML configs. The same patterns scale up to multi-node clusters and production workloads.
If you found this tutorial helpful, share it with a friend who’s curious about Kubernetes. And if you hit any snags, drop a comment below — I read every one.
Next steps to explore:
- Add HTTPS with cert-manager and Let’s Encrypt
- Set up automated MySQL backups with a CronJob
- Add a CDN like Cloudflare in front of Traefik
- Move uploads to S3 with WP Offload Media
- Scale to a multi-node k3s cluster
Part 2 Full Deployment with Traefik and Redis cache on domain and serving site worldwide
Be the first to comment